Introduction to iPhone 14 Pro Screen Replacement
The iPhone 14 Pro is known for its advanced technology and sleek design, but it is not immune to damage, particularly the screen. Understanding the screen replacement process is crucial for users who wish to either save costs or ensure their device is restored to its optimal condition. Common reasons for screen damage include accidental drops, impacts, or prolonged exposure to extreme temperatures. Over time, even minor scratches can hinder the usability of your device, making it essential to consider a screen replacement.
Replacing the écran iphone 14 pro yourself comes with various benefits. Primarily, it can be more cost-effective compared to professional repair services. While opting for a professional may seem like the simpler choice, the expense for labor can accumulate, especially if you encounter screen issues frequently. By using a reliable source such as smart-parts-shop.fr for purchasing the required pièces détachées iphone 14 pro, you can minimize costs while taking control of the repair process. Additionally, a successful self-repair can provide satisfaction and confidence in your technical abilities.
To undertake the task of écran oled replacement, it is necessary to gather some essential tools and materials. Typically, you will need a precision screwdriver set, suction cups, plastic opening tools, and adhesive for securing the new screen. These items are commonly available in repair kits or can be sourced individually from trusted suppliers such as smart parts shop, which often offers comprehensive kits tailored for the iPhone 14 Pro. Furthermore, referring to a quality tutoriel iphone 14 pro can guide you through the replacement steps, ensuring a smoother and efficient process.
Gathering Tools and Materials
Replacing the écran iPhone 14 Pro requires a specific set of tools and materials to ensure a successful and safe repair process. First and foremost, you will need a quality replacement screen. It is advisable to source the écran oled for your iPhone 14 Pro from reputable suppliers such as smart-parts-shop.fr. This site offers a range of pièce détachée iphone 14 pro products that guarantee compatibility with your device.
In addition to the replacement screen, various tools are essential for the task. A precision screwdriver set, particularly one with a Pentalobe and Phillips head, is necessary for accessing the screws that hold the device together. Using a quality suction cup will also assist in safely lifting the screen without damaging the internal components of the phone. Opening picks are recommended for gently prying apart the casing of the device. These tools can usually be found in a repair kit specifically designed for smartphones.
When gathering your materials, ensure to consider the quality of each item. Inexpensive tools may lead to further damage during the replacement process. Opt for tools and screens that have received positive reviews from previous users. For those new to DIY repairs, following a reliable tutoriel iphone 14 pro can provide you with step-by-step guidance while ensuring you have all necessary materials on hand.
Finally, it is crucial to prepare a clean and static-free workspace to avoid any inadvertent damage to your iPhone. Ensuring that you have all the required tools and materials organized before starting not only enhances your efficiency but also contributes to a smoother repair experience, resulting in a successful remplacement écran iphone 14.
Step-by-Step Screen Replacement Process
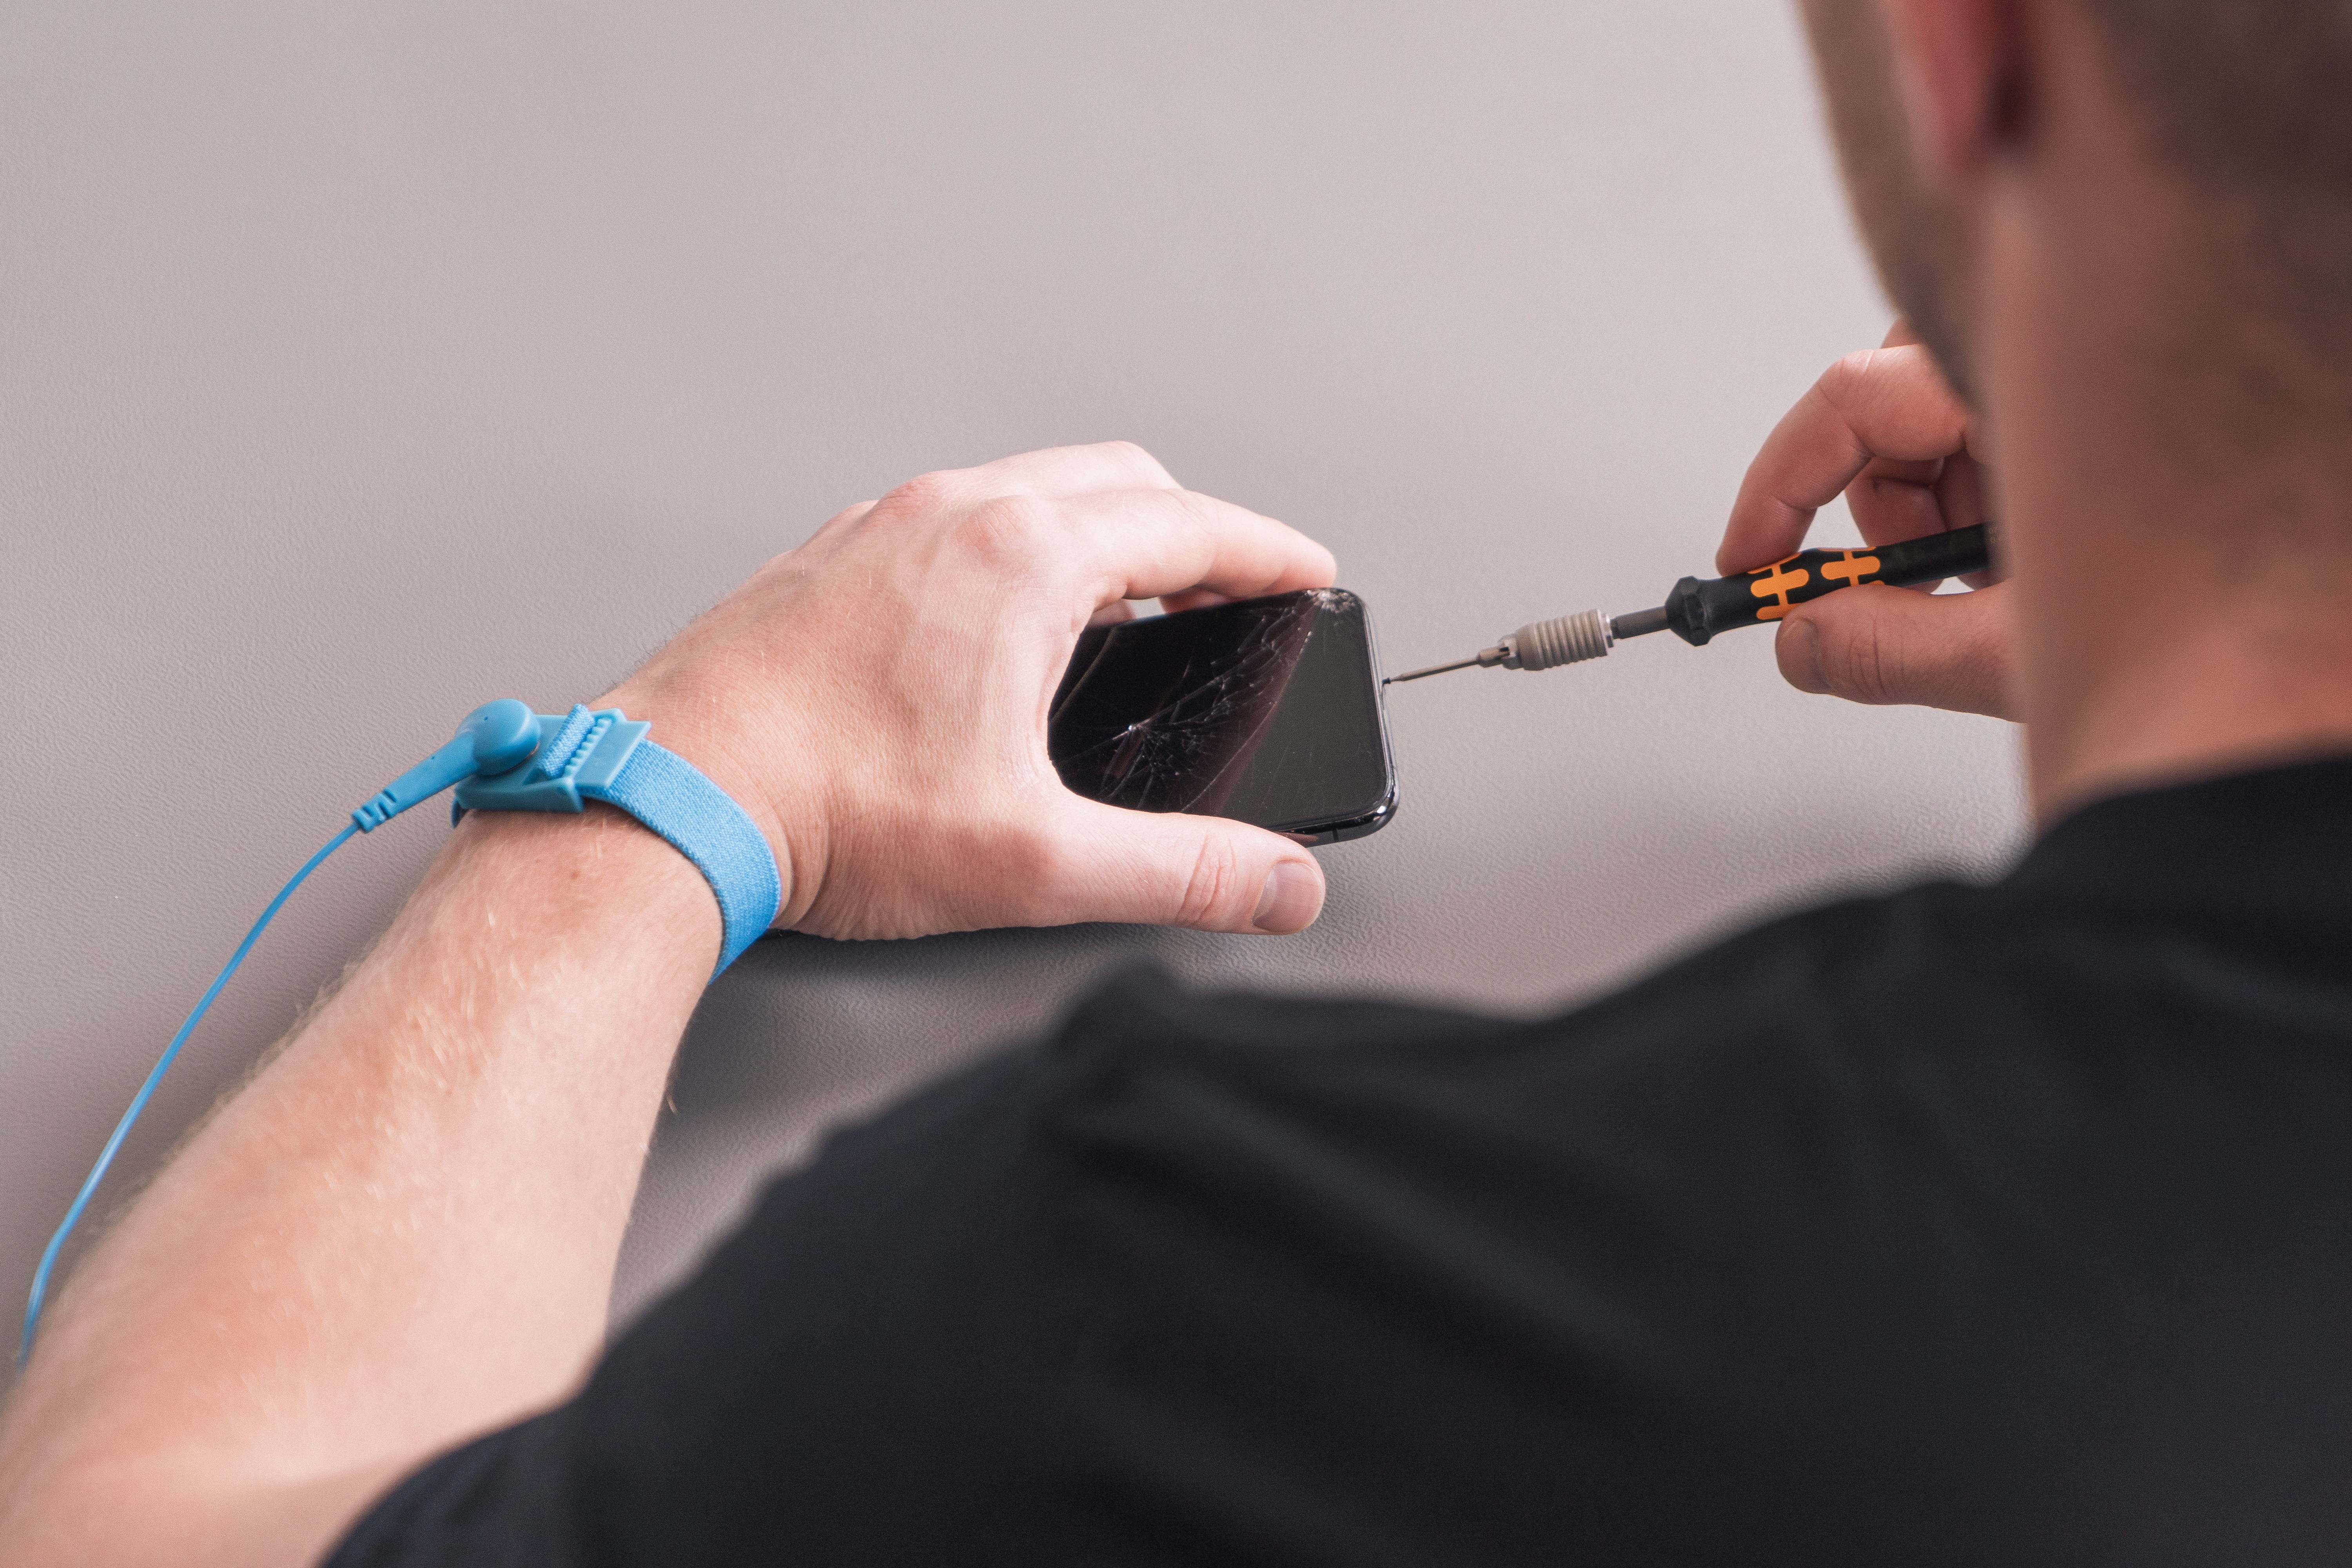
Replacing the écran iphone 14 pro requires a careful approach to ensure that each step is executed properly. Begin by powering off your device to prevent any electrical issues. Utilize a P2 Pentalobe screwdriver to remove the screws located near the lightning connector. Safely set these screws aside for later use.
Next, use a suction cup tool to lift the screen gently. Be cautious when prying open the device, as too much force may damage the delicate components. Insert a plastic opening tool between the screen and the frame to help separate them. This will allow access to the internal parts of your iPhone 14 Pro.
Once the screen is detached, it’s essential to disconnect the battery. Locate the battery connector and carefully disconnect it using a spudger tool to prevent any short circuits during the replacement process. Afterward, proceed to disconnect the screen itself by unscrewing the bracket that holds the display connectors in place. Keep these screws organized, as they will be required for the reassembly.
After removing the old écran oled, take a moment to clean the surfaces ensuring no dust or debris will interfere with the new screen’s installation. Now, take the new écran iphone 14 pro from smart-parts-shop.fr and align it properly over the frame. Ensure that all connectors are securely positioned and that the screen fits snugly.
Reconnect the battery and the display connectors, replacing the bracket with the screws. After reassembling all parts, gradually push the screen back into its original place. Reinsert the two Pentalobe screws at the bottom of the device to secure everything in position.
Finally, power on your iPhone 14 Pro to ensure that the replacement screen is functioning correctly. If you encounter any issues, double-check the connections and components to troubleshoot effectively. By following this detailed tutoriel iphone 14 pro, you can successfully réparez écran iphone with minimal risk.
Testing and Finalizing Your Repair
Having successfully completed the installation of your new écran iphone 14 pro, it is crucial to proceed with testing the functionality of the replacement to ensure everything is working as expected. Start by powering on your iPhone 14 Pro and examining the display for any irregularities. Check for screen brightness and color accuracy, as the quality of an écran oled should demonstrate vivid colors and sharp resolutions.
Next, test the touch response by swiping across the screen and using different applications. Ensure that multi-touch functionality is operational, as well as checking for any dead spots where touch inputs may not register. If you notice any discrepancies in sensitivity or responsiveness, it may indicate that the installation process was not entirely successful, and additional adjustments might be needed.
Once you have confirmed that the screen operates correctly, you will want to finalize the repair by sealing the device. Carefully align and secure the housing back into place, ensuring that all connections are properly seated. To do this, gently press around the edges to guarantee a snug fit without exerting too much force, which may damage the new piéce détachée iphone 14 pro. Following the sealing process, ensure that all screws are returned to their designated locations.
In case the écran iphone 14 pro begins to malfunction post-installation—like flickering, unresponsive areas, or other abnormalities—it is essential to revisit your previous steps. Carefully inspect the connection cables and ensure everything is secure. If complications persist, consulting with a professional at smart-parts-shop.fr or following a detailed tutoriel iphone 14 pro could clarify any remaining issues.